Showing posts with label comfort. Show all posts

Sunday, 12 January 2014

One chicken, three meals

For my posts in 2014, I thought I would try to give you all some insight into how my food brain works: mainly, how the heck I decide what I'm going to cook on a weekly basis.

It all begins when I get a food craving: one particular week, that craving was for roast chicken (and stuffing and mashed potatoes...instead of the usual turkey I had lamb for Christmas, and I was consequently going into a bit of roasted bird withdrawal).  So I say to myself, "Self, we're going to make a roasted chicken this week."

Now, my absolute favourite roasted chicken recipe of all time is forty clove chicken...because anything that literally involves three bulbs of garlic can't not be absolutely delicious.  Along with adding flavour, the brine helps to keep the meat nice and moist, which means that you're safe to leave it in the oven a little bit longer (ensuring that your roast chicken is cooked and that no one at the table gets food poisoning)....if you want you can increase the cooking time to 25 minutes per pound instead of the typical 20.

I like to add a clove or two of roasted garlic to the mashed potatoes...and I also like to puree some into the gravy.
Since brining the chicken requires buying a bunch of celery, I thought that I had better find a way to use the rest of the bunch (I find that celery goes floppy quite quickly in my fridge, and I absolutely despise wasting food).  My answer: stuffing.

Every family has a slightly different recipe for stuffing, and every child is certain that their mother's is the best.  I am no exception to that rule, and firmly believe that my mother's sausage and raisin stuffing is the benchmark against which all other stuffing recipes should be measured.  The problem with using recipes from our mothers, however, is that moms tend not to really measure ingredients once they've been making something for awhile...and mine is no exception.  So the quantities here suggested are just that, suggestions...feel free to modify the recipe to suit your own taste buds.

Ingredients
-2 stalks celery, chopped
-1 large onion, diced
-1/2 pound pork breakfast sausage (casing removed if using links)
-1 cup raisins
-1 loaf of bread (I personally like sourdough), cubed
-1 or 2 cups of chicken stock (more or less depending on how "wet" you like your stuffing)
-1 or 2 tbsp poultry seasoning 
-salt and pepper to taste

First, brown the sausage in a frying pan.  Add the veggies, and cook until they are beginning to soften.  Combine the vegetable and sausage mixture with the remaining ingredients in a slow cooker; cook on high for 2-3 hours (adding more liquid if necessary/desired).

Doesn't that look delicious?  Don't worry, there are plenty of leftovers...
Once the chicken is roasted and that meal is finished, the next thing to figure out is exactly what to do with the leftovers (of which there are plenty, even once you have put some aside for lunch the next day).  Chicken soup is an obvious solution...and the carcass of a forty clove chicken makes a particularly flavourful stock.  

To make the chicken stock, first pull all the remaining meat off of the bones and put it in the fridge for later.  Then add the chicken bones, all the aromatics (celery, garlic, etc.) that were inside the chicken while it was roasting, one of the bulbs of roasted garlic, one coarsely chopped onion, one coarsely chopped carrot, and one coarsely chopped piece of celery to a large soup pot.  Cover everything with water and bring to a boil; then lower the heat and simmer for an hour or two.  Strain out all the bones and veggies and add salt and pepper to taste, and then you have a deliciously flavourful stock.  At this point it is quite easy to make soup: all you need to do is add the leftover chicken meat (chopped up or shredded into fairly small pieces), some finely chopped carrots and celery, and some noodles (or rice, or pearl barley).

Soup was not was I made, however.  Instead, roasted chicken day 2 involved simply sauteeing the leftover chicken with the leftover gravy and serving it over the leftover stuffing I had warmed up in the oven...I had better plans for the stock.

Since the stock that this chicken makes is so strongly flavoured, I decided to use it to make a delicious risotto.

I've talked about risotto one this blog once before, but I cannot stress the deliciousness of this creamy rice dish.  Sure it's involved and you have to spend basically the entire cooking time standing at the stove and stirring...but the results are worth it.

Ingredients
-1 tbsp olive oil, divided
-cremini mushrooms, sliced
-small onion, diced
-2 cloves garlic, minced
-2 cups arborio rice
-1/2 cup dry white wine
-6 to 8 cups of chicken stock
-1/2 cup grated parmesan
-1 cup frozen peas

In a medium sized pot, bring the chicken stock to a gentle simmer.

First (using half of the olive oil), saute the mushrooms in a large, heavy bottom pot.  Set aside.

In the same pot (over medium heat), use the remaining oil and saute the onions and garlic until they just begin to soften.  Add the rice and mix well.  Cook for about 2 minutes.

Turn down the heat slightly, and add the white wine, stirring until the liquid is almost absorbed.  Add the chicken stock, 1 cup at a time, stirring until the liquid is fully absorbed.  Continue that process (add liquid, stir until absorbed) until the rice is al dente (tender, yet still firm...but not crunchy)...the process should take 20 to 30 minutes (but don't panic if it takes longer).

Stir in the parmesan cheese, mushrooms, and frozen peas; mix well.  Season with salt and pepper if desired.

"Vegetarian"...full of vegetables, though it uses chicken stock as the base.  Could easily be made truly vegetarian if vegetable stock were used instead, though that would change the flavour.  You could even add some shredded leftover roasted chicken to make it a truly balanced meal...
The rich, roasted garlic flavour of the stock comes through in the rice, and marries quite well with the roasted mushrooms and parmesan.  The green peas give a burst of freshness (and a much needed serving of veggies)....serve with a salad and a glass of the white wine that you used in the recipe.  Enjoy!!

Sunday, 15 December 2013

Low & slow

It's snowing today.  I don't know about you, but I think that days like this call for stew.

While it is quite easy to make a good stew in a relatively short period of time, nothing really beats the taste and texture of something that has been braising for hours.  "Braising" involves cooking a piece of meat in some liquid at a low temperature (just barely simmering) for a very long time (ideally several hours), resulting in meat that is oh so tender and flavourful.

At first glance this recipe seems really involved...but then you realize that the meat is going to spend three hours in the oven, so the prep time isn't really that bad.  The meat portion of this recipe could easily be made in a slow cooker (though slow cookers aren't that great at baking biscuits...if you wanted to make the biscuit topping you would have to do that separately in the oven).  Also, since this recipe comes from a cookbook dedicated to beer that is what makes up the braising liquid...if you're not a beer fan you could try substituting an equivalent amount of wine, beef stock, or onion soup (from one of those powdered onion soup mixes).  Basically: braise your meet in something that you like the flavour of, because that is what it's going to taste like at the end.

Ingredients

Beef
-2 lb beef roast, cut into cubes.  Because you're going to be braising this for quite a long time you can go with one of the cheaper cuts...those cuts are usually less expensive because they have a lot of connective tissue/fat and are difficult to cook (and are therefore the perfect cut for this kind of braise)
-3 tbsp butter
-4 slices of bacon, cut into 1 inch pieces
-1 onion, diced
-2 cups of English brown ale (Newcastle is a readily available variety).  If you're using a roast that is bigger than 2 lbs, increase the amount of beer.
-2 cups beef or chicken broth
-3 or 4 sprigs of fresh thyme
-1 bay leaf
-12 to 14 cremini mushrooms, halved
-1/2 cup frozen green peas
-1 large carrot, diced
-salt and pepper to taste

Biscuit topping
-1/2 cup milk
-1 tsp lemon juice
-1/4 cup melted butter
-2 cups all purpose flour
-2 tsp baking powder
-1/2 tsp baking soda
-1 tsp salt
-1/2 grated cheddar cheese
-1/2 cup English brown ale (helps the biscuits rise, so if you're not going to be using the beer in this particular instance you will want to find a different biscuit recipe.  Alternatively, you could just top the beef with mashed potatoes, shepherd's pie style)

1) Heat the oven to 300 degrees F; set the rack in the second lowest position.

2) On the stove, over medium heat, melt 2 tbsp of butter in a large Dutch oven (if you do not have a Dutch oven a heavy stainless steel pot will do...it just needs to be something with a fitted lid that you are able to put into the oven.  If you are going the slow cooker route a frying pan will also do the job.)  Divide the beef into at least two batches and sear the outside of the pieces until deep brown and caramelized (the goal here is not to cook the beef all the way through, it is to add some nice browned flavour).  Remove from the pan and set aside.

It's tempting to add all the beef at once and just stir it around until it is brown...but don't.  If you overcrowd the beef it will actually steam instead of searing, and you won't get that delicious browned flavour into your meat.  It takes more time, but it's totally worth spreading out the pieces and taking the time to brown each piece.
3) Add the onions and bacon.  Cook, stirring occasionally, until the bacon has begun to crisp.  Remove the onions and bacon (drain off some of the fat if there is lots in there) and add the beer to deglaze the pan (use a wooden spoon to scrape all the brown bits off of the bottom).  Add the browned beef, onions, and bacon back into the Dutch oven.  Add the broth, thyme, and bay leaf.  Cover and move to the heated oven.  Cook with the lid on for two hours.  Then remove the lid and cook, uncovered, for one more hour (if at any point the pot dries out add more liquid).

It will be in the oven for three hours, and you don't have to stir it, giving you time to do other things.
If you're going the slow cooker route, follow the above directions as far as using the beer (or whatever liquid you have chosen) to deglaze the pan.  However, instead of adding everything back into the Dutch oven, put all of the ingredients into a slow cooker and cook on low for 6 to 8 hours.

4) During the final hour of uncovered cooking, prepare the mushrooms and the biscuit topping.  For the mushrooms, melt 1 tbsp butter in a frying pan over medium heat.  Add the mushrooms and toss to coat.  Cook until they have shrunk noticeably and have turned dark golden brown; set aside.

For the biscuit topping, start by combining the milk and lemon juice in a small bowl; let stand at room temperature for 15 minutes.  Meanwhile, whisk together the flour, baking powder, baking soda, salt, and cheese.  Add the melted butter and beer to the milk and lemon juice mixture, then pour the wet ingredients into the dry ones and mix until just combined.

5) After the hour of uncovered cooking, remove the thyme and the bay leaf from the Dutch oven.  Increase the oven temperature to 400 degrees F.  Add salt and pepper to taste, then stir in the frozen peas, diced carrots, and mushrooms.  Drop the biscuit batter over the top of the stew.

Leave some room around the edges for the steam to escape.
Return the pot to the oven and cook for another 45 minutes or so (until the biscuits are nice and brown).  Let stand for 15 minutes until serving.

If you've decided to go the slow cooker route you have a couple of options for the biscuit step.  First, you could omit them all together and just serve your stew with mashed potatoes.  Second, you could choose a different biscuit recipe (I've provided a nice one here) and just serve them on the side.  Finally, after mixing in the veggies you could transfer everything from the slow cooker to a 9x13 baking dish, cover with the biscuits, and bake as directed (400 degrees F for 45 minutes, or until brown).  The choice is yours!

Letting it stand is the hardest part, because by the time you get it out of the oven that final time you've been subject to the delightful aroma for hours.  Dig in and enjoy your warm (and comforting) stew!

Sunday, 29 September 2013

Two of my favourite things

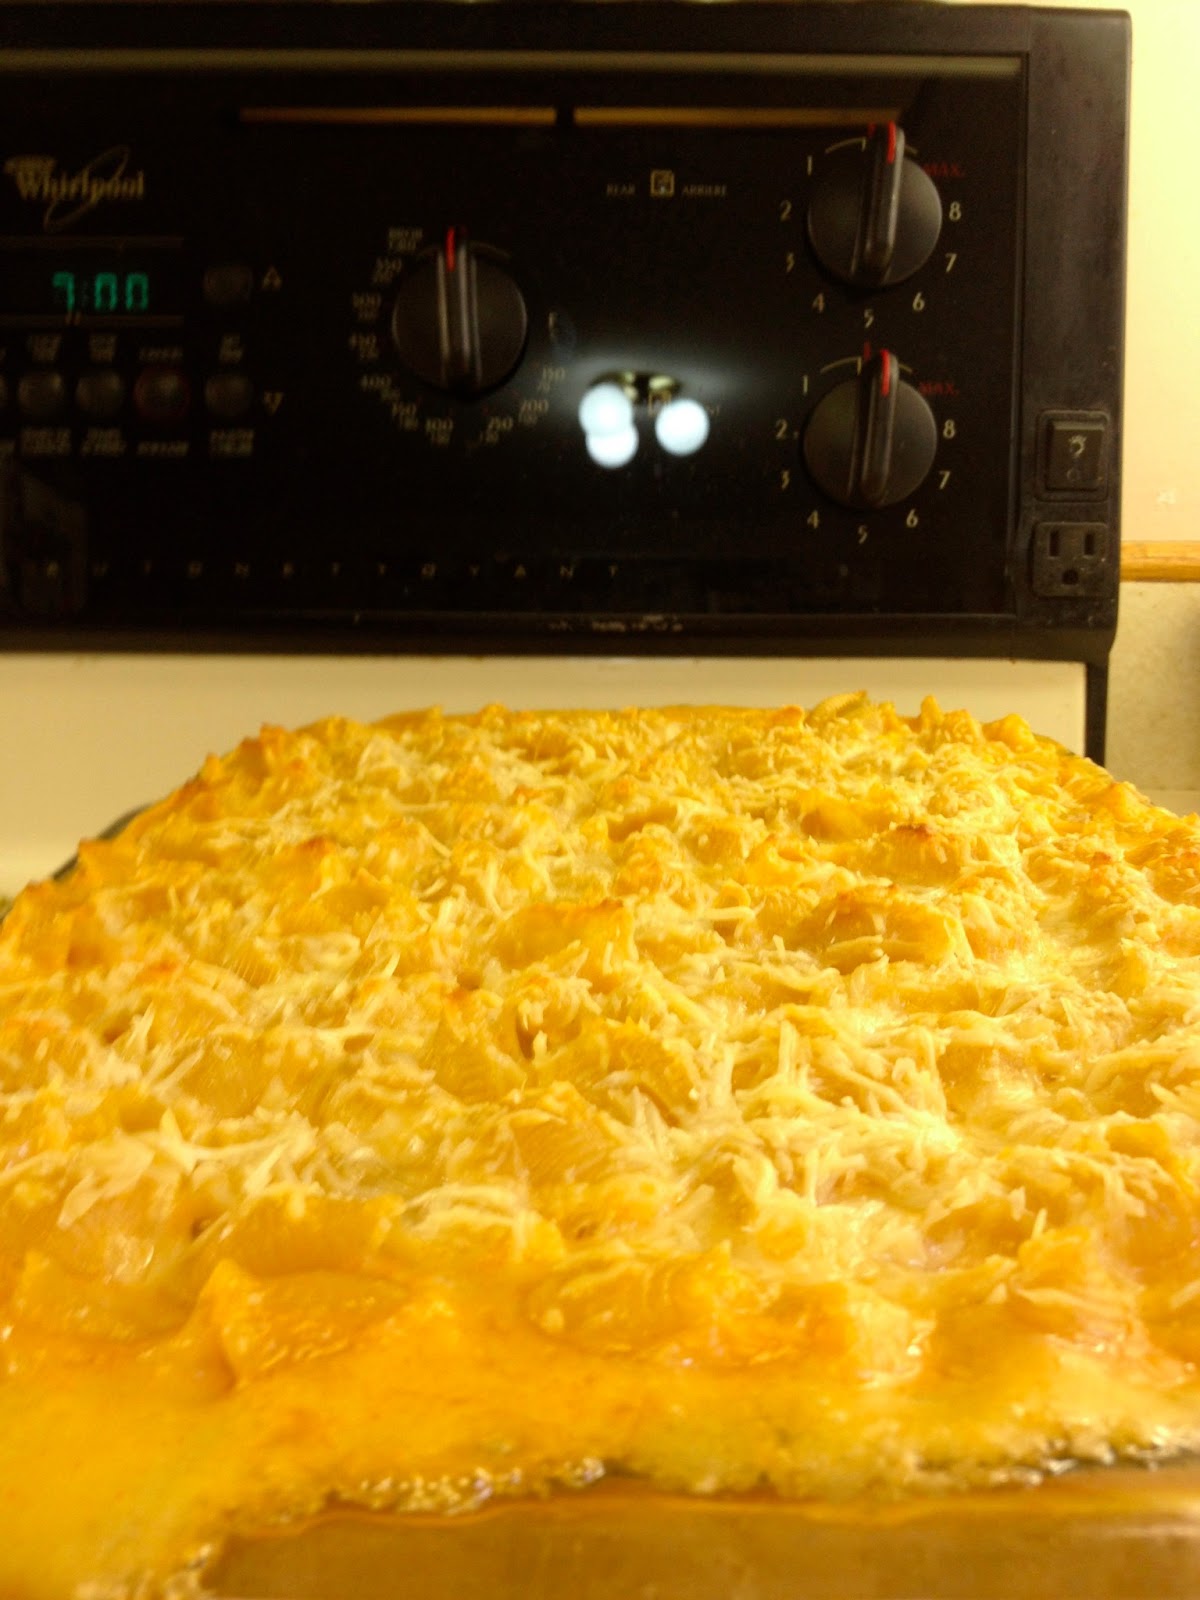
It's no secret that I love macaroni and cheese.  I've dedicated not just one, but two blog posts to the subject...and this will be the third.  Another not-so-secret fact about yours truly?  I like to drink.  Not just anything mind you.  I like the flavours that you can find in different alcohols: like the citrus in white beer, or the berries in red wine.  So, when I came across a recipe that combined the deliciousness of macaroni and cheese with the scrumptiousness of stout I had to give it a go!

Ingredients
-500 g uncooked rotini pasta
-2 tsp canola oil
-200g hot Italian sausage
-1 large onion, diced
-3 tbsp all purpose flour
-1/2 tsp black pepper
-1/8 tsp salt
-1 bottle of stout (341 mL)
-1/2 cup milk
-80g each grated cheddar cheese and cubed Velveeta (or other processed offering...makes for a very creamy sauce)
-1 1/2 cups frozen green peas

1) Preheat oven to 450 degrees F.  Grease a 9x13 casserole dish

2) Cook pasta according to package directions; drain.

3) While pasta cooks, heat a large saucepan over medium high heat.  Add oil, swirl to coat.  Remove casing from sausage.  Add sausage and onion to pan; cook 6 minutes, stirring to crumble sausage.  Add flour, pepper, and salt; cook 1 minute, stirring frequently.  Stir in beer; bring to a boil.  Cook 3 minutes (until thick and bubbly).  Remove from heat.  Add milk and cheeses, stirring until smooth.  Stir in pasta and peas.  Spread into prepare baking dish and bake for 10 minutes (until lightly browned).

Looks yummy....tastes good too.
It doesn't look like your typical plate of macaroni and cheese...and it doesn't taste like it either.  The stout gives the sauce a very interesting flavour that I would describe as "mushroom-y" (what I believe the professionals call "umami").  Next time, I think I would swap the cheddar in for something like Swiss...I think that nutty kind of flavour would go well with the stout.  I might also choose a different kind of sausage: while I love sausages of the hot Italian variety I found that I couldn't really taste the spice (which is kind of the point of hot Italian sausage).  The above recipe would probably work just as well with ground beef, or a most lightly flavoured pork or turkey sausage.

Or a few red pepper flakes.  Because everything is better with red pepper flakes.

Sunday, 15 September 2013

La-la-lasagna!

Homemade lasagna is a showstopper: beautiful layers of tomato sauce and pasta, all topped with bubbly cheese.  It's a great dish for company...and it's also one of those things that you can make ahead and freeze.

Make-ahead meals are fantastic for those of us that don't have a ton of time on our hand but still want to eat delicious food.  All you need to do on those lazy days is pop whatever you have in the freezer straight into the oven and bam!...great food, no work.  Even better: freeze your lasagna in one of those disposable roasting pans you can buy at the grocery store and you've got a great meal with nearly no dishes.

Don't let the number of ingredients and steps scare you.  It might seem like a lot of work, but there's actually quite a bit of waiting around.  Also: it's totally worth it.

Ingredients (for one 9x13 lasagna.  Double to make one lasagna now and another one later.)
-500g lean ground beef (or any ground meat of your choice.  Half beef/half italian sausage is especially delicious)
-1 onion, diced
-2 cloves garlic, minced
-1 tsp dried oregano (or 1 tbsp fresh)
-1/4 tsp crushed red pepper flakes
-1 jar of your favourite pasta sauce (alternative: use 2 jars of pasta sauce and omit the diced tomatoes)
-540 ml can of diced tomatoes with Italian herbs (or this delicious marinara sauce...I keep bags of it in the freezer)
-2 tbsp dried basil (or 1/3 cup fresh)
-1 tbsp balsamic vinegar
-1/2 tsp black pepper
-12 uncooked lasagna noodles (12 is a guess based on how many noodles I usually need...use as many as you need for 3 layers)
-2 cups ricotta cheese
-300g frozen spinach, thawed, squeezed dry, and chopped
-1/3 cup grated parmesan cheese (or romano, or asiago.......)
-1 egg
-1 1/2 cups grated mozzarella

1) Preheat your oven to 375 degrees F and spray a 9x13 baking dish (set aside).

2) Make the sauce.  Add beef, onion and garlic to a large pot; cook over medium heat until meat is no longer pink.  Add oregano and crushed red pepper flakes; cook for 1 more minute.  Add pasta sauce, tomatoes, basil, vinegar, and black pepper.  Bring to a boil, then reduce heat to low and simmer for 20 minutes.

3) While the sauce is simmering, cook the lasagna noodles.  Tip: I don't like to cook mine all the way through at this stage...if you leave them ever so slightly underdone they're easier to work with (and they'll finish cooking in the oven).  Drain the noodles, rinse them with cold water, and drain them again.

4) In a medium bowl mix together the ricotta, spinach, parmesan cheese, and egg.

5) Assemble the lasagna!

Start by spreading 1 cup of meat sauce over the bottom of your baking dish.
Top with a layer of noodles.
Spread 1/3 remaining sauce over the noodles, followed by 1/3 of the mozzarella, and one more layer of noodles.
Top with 1/3 sauce, and all of the ricotta mixture (spread evenly, don't worry if it mixes with the sauce)
Cover ricotta with 1/3 mozzarella and the last of the noodles.
Cover the last noodle layer with the remaining sauce and mozzarella.  Make sure to spread all the way to the edges to prevent your lasagna from drying up...add chicken stock/red wine to make your sauce go farther if necessary.
This is the point when you can freeze your lasagna.  Let cool (until no longer steaming), then cover in tinfoil, then wrap with plastic wrap (keep as much air out as possible) before putting it in the freezer for later.

6) Cover with foil and bake for 35 minutes, then uncover and bake for an additional 15 minutes.  Let the lasagna stand for 15 minutes before cutting.

Letting it stand is the hardest part, but is worth it to avoid burning yourself on hot mozzarella.
If you went the frozen lasagna route, your lasagna can go straight from the freezer to a 375 degree oven (though you should take off the plastic wrap first).  Cook covered for 45 minutes to an hour, then check the temperature by inserting a metal knife into the centre: stick in the knife, then pull it out and touch it.  If the knife is cold to the touch your lasagna needs more time, if it is warm, then you can uncover and bake for another 15-20 minutes (until the cheese and sauce are bubbly).  Let stand before cutting.

Yum.  That is all.

Tuesday, 10 September 2013

Start with a side dish, and make it a meal

That's exactly how my meal planning went this past weekend.  Here's how the decision went down...

I had some potatoes leftover from last weekend's camping, and decided that I ought to use them sooner rather than later.  While thinking about all the different ways that I could cook them I landed on something I hadn't made in awhile (due to the warm summer weather): scalloped potatoes.

Being as the weather has started to cool down, I thought this idea was perfect.

My original plan had been to make scalloped potatoes as a side dish with some chicken.  So I spent some time thinking about what I could do with the chicken...and I couldn't think of anything.  Well that's not actually true; I could think of many things, but none of them were particularly attractive options on this particular fall afternoon.  So I took a slightly different tack and tried thinking about the different things that I could do with scalloped potatoes and realized why I couldn't settle on a chicken recipe...the potatoes were going to be rich and delicious and filling, and there was no real need for any additional food.

Though I did make some space for a side salad.  Gotta get the greens in somewhere!

Scalloped potatoes, as I mentioned, are typically thought of as a side dish, something rich and delicious that you serve along with a simply roasted piece of meat.  But with a few tweaks it's quite easy to make them into a complete meal.  And as there are so many different ways to make scalloped potatoes all I'm going to share is the basic method...that way you can make the casserole your own!

Ingredients/Directions:
-potatoes (obviously); 2 to 2 1/2 pounds, cut into 1/4 inch thick rounds.  Starchy potatoes are best since they will absorb the most liquid and will thus prevent your casserole from being too soupy.
-liquid; 2 1/2 cups.  Most of us are probably familiar with using cream, but you can also lighten up your scalloped potatoes by using any combination of cream, chicken (or vegetable) stock, and milk (so long as the combination adds up to 2 1/2 cups)

The first step (after preheating the oven to 400 degrees F and greasing a 9x13 casserole) is to simmer the potatoes in whatever liquid you've chosen.  Combine the potatoes and liquid in a large skillet along with 1/2 tsp salt and some black pepper (to taste).  Simmer, partially covered, over medium to medium-low heat until barely tender (8 minutes or less).

I chose to simmer my potatoes in a combination of skim milk and chicken stock, along with a pinch of cayenne pepper for spice.
-toppings.  I usually put straight cheese on top of my potatoes, but breadcrumbs and nuts are also lovely.  Use as much or as little as you feel necessary.
-fillings.  This is where things get interesting and you can mix all sorts of neat flavours into your scalloped potatoes.  In order to make the casserole into a complete meal meat is a great option (suggestions: ham, italian sausage, ground beef), just make sure that it's cooked first.  Same with any veggies that you choose to add (onions, leeks, fennel, and mushrooms are all great options).

My toppings (small white bowl on the lower right) were a combination of parmesan cheese, panko, and walnuts; and I filled my scalloped potatoes with hot italian sausage, caramelized onions, and old cheddar.
Once your potatoes are barely tender it's time to get everything into the casserole.  Using a slotted spoon, transfer half of the potatoes into the bottom of the casserole dish, spreading them out as evenly as possible.  Arrange your chosen fillings evenly on top of the potatoes.  Top with the remaining potatoes (again, spreading them as evenly as possible) and pour any remaining liquid over all of the ingredients.  Scatter your toppings over the potatoes, and bake until it's bubbly, brown, and the potatoes are completely tender when poked with a fork.  Let stand 10 to 15 minutes before serving (this gives the potatoes times to soak up more of the liquid).  And, as always, enjoy!

Served with green peas to get an extra serving of vegetables onto the plate.  And, like many casseroles, these potatoes tasted even better the next day!

Tuesday, 3 September 2013

Camping in style

My favourite part of camping, hands down, is roasting sausages and marshmallows over a fire.  But there is a limit to the number of sausages that I can eat over a weekend, and these gaps in the menu need to be filled with some other kind of food.

So I did what seemed obvious: I roasted a chicken.

Seriously, over a campfire.

If my time in Girl Guides taught me anything, it was that you did not necessarily have to compromise when it came to the food that you ate while camping.  It's actually quite easy to turn your campfire into an ovenlike device...all you need is a roll of tinfoil.

But before I get there....allow me to talk a little more about the chicken itself.

My initial idea was to cook the chicken beer can style, that is, with a can of beer shoved up it's butt.  After some careful research, however, I discovered that this wasn't really the best method to use: according to one obsessive compulsive engineer the beer in the can imparts very little in terms of flavour, which to me would be the entire point of this particular cooking method.

Since the boyfriend loves beer, and since I want to get as much beer flavour into the chicken as possible I decided to go the route of a brine.  Brining basically involves soaking in a solution of salt (and other things)...it gives the chicken extra flavour, and helps to keep it moist while it cooks (important as I was going to be cooking this bird for an as yet undetermined amount of time over a campfire of unknown temperature).

All you need in a brine is liquid (typically water), salt, sugar, and any other seasonings (vegetables, herbs, etc) that you desire.  I used the following ingredients, which could easily be swapped out for something that you like a little more.....

-750 ml beer (I chose a strong brown ale)
-750 ml water (giving 1.5 litres of liquid total)
-1/4 cup salt
-1/4 cup sugar
-1 onion, quartered
-1 carrot, roughly chopped
-1 bay leaf

To make the brine, combine all of the ingredients in a large pot and bring to a boil (this is what gets the carrot, onion, and bay leaf flavour into the liquid).  Once the liquid is boiling remove it from the heat and cool to room temperature.

Note: cooling to room temperature is very important!  Raw chicken + still-warm brine = bacteria farm!

Once the liquid has cooled pour it over the chicken (so that it is covered).  If you don't have enough brine to completely cover the chicken that's fine...in cases like these I like to keep the bird breast side down (since there isn't a ton of meat on the back).  Refrigerate and soak overnight (ideally) or for 1 hour per pound of meat (if you're strapped for time).

For even more flavour (and to encourage a crispy skin) I also used a spice rub made up of sugar, salt, black pepper, and chili powder.

When it came to cooking the chicken I decided to invest in a vertical chicken roaster, which would allow my chicken to stand up on the grill over the campfire.

I chose the vertical method because of the campfire: roasting horizontally (in a roasting pan) would have resulted in the back side of the chicken cooking far faster than the front.  With this method the lower part of the chicken (legs and thighs...closer to the fire) cooks a little faster than the top (breasts and wings) which is actually quite perfect given that legs and thighs typically take a little longer to cook all the way through (and are less likely to go dry if they are overcooked).
No matter which way you decide to roast your chicken (vertically or in a roasting pan), the key to the process is not letting too much heat escape (the logic behind closed oven door or lids on the roasting pans).  Since campfires typically do not come with a cover I had to get creative with a roll of tin foil.  I used two fairly long pieces to create a tent over the bird, and weighed the ends down with logs.  As soon as the second piece of foil was in place the bird began to sizzle...

I gave my chicken about 90 minutes to roast (since the last thing you want to do while camping is consume raw poultry).  The general rule of thumb is about "20 minutes per pound" (some recommend adding an additional 15 to 20 minutes on top of that number), but regardless of how long your bird has been on for you will want to check the temperature (should read 165 degrees F) or even cut into the breast or thigh (meat should no longer be pink and juices should run clear).

I'm pretty proud of my chicken.  The brine definitely imparted some beer and garlic flavour into the meat, and helped the bird stay nice and juicy.  Served with corn (also cooked on the fire) and a baguette...this meal will definitely make it back onto next year's camping menu!

I served the chicken sitting on the stand...it was just me and the boy so there was no need to be polite: we tore pieces of meat straight off the bones.  Messy, but delicious!

Sunday, 11 August 2013

Mac and cheese, 2.0

The last time I posted about making mac and cheese the subject of my musing was an ooey gooey oven baked casserole.  Delicious.  However, completely impractical given the summer heat.  Better to do it on the stovetop, and add some fresh veggies for colour and crunch.

And bacon.  Because everything's better with bacon.........

Ingredients
-3 cups broccoli florets (use pre-cut to save time)
-4 cups uncooked rigatoni (or any other pasta that you have in the cupboard)
-2 slices bacon
-1/2 tbsp butter
-1 1/2 tbsp flour
-1 1/4 cup milk
-1/2 cup (ish) Velveeta cheese, cubed (the secret to a creamy sauce)
-1/2 cup (ish) shredded cheddar
-salt and pepper to taste

1) Steam broccoli for 5 minutes or until crisp-tender.  Drain; pat dry and keep warm.

2) Cook the pasta in the same pot.  Drain; return to pot and keep warm.

3) In a small frying pan cook the bacon until crispy; remove to a paper towel but reserve drippings.  Add butter and flour to create a roux and cook for 1 minute, stirring constantly.  Slowly add milk (stirring well to incorporate) and then bring to a boil, stirring constantly.  Cook for 1 minute, until slightly thick, and remove from heat.  Add Velveeta and stir until incorporated, then add the shredded cheddar.  Season with salt and pepper to taste.

4) Add sauce to broccoli and pasta.  Crumble bacon over the top and enjoy!!

Don't worry if broccoli isn't your thing...you can replace it with any other vegetable that you like.  A cup of frozen peas works particularly well, just add them to the sauce at the same time as the shredded cheese so that they heat through!

Sunday, 16 June 2013

Thinking outside the box (of KD)

Let's face it: I haven't posted in awhile.

As I alluded to the last time I posted, I've been going out for dinner a lot over the last couple of weeks.  But the other night while staying with my parents I finally found a chance to cook.  The weather was cold and stormy, which called for something warm and bubbly: macaroni and cheese.

Like any good college student, I fell in love with macaroni and cheese in the form of Kraft Dinner, the radioactive orange meal in a box that contains more preservatives than dairy products.  As I grew older, however, I started to desire something that tasted less like sodium and orange number six.

The potential problem with homemade mac and cheese is one of money: good cheese is expensive, and good cheese is what adds flavour.  So I had to find another way to make this casserole taste delicious.....

I found the answer in a recipe by the fantastic Michael Smith.  You can use whatever pasta you have in the cupboard and, better yet, whatever cheese happens to be in your fridge (or on sale).  The flavour comes from the spices added to the sauce: garlic, paprika, cayenne, and dijon mustard (Michael Smith's secret weapon).

Ingredients
-1 pound of pasta (any kind)
-1/4 cup butter
-several cloves of garlic
-2/3 cup flour
-a big splash of white wine
-5 cups milk
-1 pound cheese (any kind)
-2 tablespoons dijon mustard
-2 tablespoons paprika
-cayenne pepper to taste

Directions

Optional step 0......for more flavour, use bacon.  Chop approximately one pound of bacon and toss into a thick bottomed saucepan over medium-high heat (if you add one cup of water, you can allow the bacon to gradually release it's fat and brown evenly without burning).  Cook until the bacon is nicely cooked; remove the bacon, but reserve the fat.

(If you go with the bacon step, omit the butter and use bacon fat instead.)

1) Cook the pasta according to package directions.  Drain (don't rinse...the start helps the sauce stick to the pasta) and set aside.

2) Melt the butter over medium heat.  Add the garlic and cook for several minutes.  Add the flour and stir with a wooden spoon until a smooth paste forms.  Continue cooking the roux for several minutes to add flavour.

3) Add the wine, and stir until the mixture becomes smooth again.  Slowly add the milk and switch to a whisk, stirring until the mixture is smooth.  Then cook a couple of minutes longer until the milk begins to thicken.

4) Stir in the cheese, dijon mustard, paprika, and cayenne pepper.  Stir the cooked pasta into the cheese mixture.  Pour everything into a 9x13 pan and bake at 350 degrees F for about 30 minutes (or until the cheese is bubbly).

For added flavour I like to sprinkle extra parmesan cheese across the top of my mac and cheese....
Then, as always.....enjoy!!


Sunday, 20 January 2013

Comfort for a cold night

When the days are short and cold I find myself wanting to eat things that are warm and comforting.  Unfortunately, most of these recipes involve obnoxious amounts of butter and heavy cream, which is not what I want to eat when I'm trying to avoid putting on winter weight.

Luckily, there are ways to cheat the system and create delicious, comforting meals that you don't have to feel guilty about eating.  In a chicken pot pie, you can give the classic a makeover by packing it full of green veggies and using low fat milk and chicken stock instead of cream.  Also, ditch the thick buttery pie crust and opt for thin sheets of crispy phyllo!

You will need the following...

-about 1lb boneless, skinless chicken breast, cut into 1/2 inch chunks
-salt and pepper
-1 tbsp olive oil
-2 leeks, bottom 4 inches only, washed well and chopped
-2 ribs celery, chopped
-2 medium potatoes, unpeeled and cut into 1/2 inch pieces
-2 cloves garlic, minced
-1 1/2 cups milk
-1/2 cup flour
-2 cups chicken stock
-2 cups frozen peas
-1 tbsp fresh thyme (or 1 tsp dried)
-3 sheets of frozen phyllo dough, thawed

First, preheat your oven to 350 degrees F.

Then, season the chicken with salt and pepper.  Heat 1 tsp oil in a non-stick skillet over medium heat.  Add the chicken and brown; transfer to a plate.

Heat 1 tsp more oil in the skillet.  Add the leeks and celery and cook until the vegetables begin to soften.  Add the potatoes, garlic, 3/4 tsp salt, and 1/4 tsp pepper and stir well to combine.

Add the milk.  Stir the flour into the broth until it is dissolved and add that mixture to the pan.  Cook, stirring, until the mixture comes to a boil.  Reduce the heat to medium low, cover, and simmer (stirring every so often) for about 10 minutes.  Stir in the chicken, peas, and thyme.

Now you're ready to put everything into the dishes to bake.  If you have little individual size baking dishes that's ideal, but if you don't this whole mixture should fit comfortably into a 9x13 baking dish.  You won't get that same "pot pie all to yourself" feeling, but it will be just as delicious.

Once you've spooned the mixture into the baking vessel of your choice it's time to cover it with the phyllo.  Cut the sheets to the correct size.  Place one sheet on top of the dish and brush with some olive oil; repeat with all the layers.  Tuck the edges into the rim of the dish, and sprinkle with some parmesan (if desired).  Bake for about 30 minutes...until the filling is bubbling.  Be careful when you take your first bite!

Perfect for when it's cold outside!