Sunday, 20 January 2013

Comfort for a cold night

When the days are short and cold I find myself wanting to eat things that are warm and comforting.  Unfortunately, most of these recipes involve obnoxious amounts of butter and heavy cream, which is not what I want to eat when I'm trying to avoid putting on winter weight.

Luckily, there are ways to cheat the system and create delicious, comforting meals that you don't have to feel guilty about eating.  In a chicken pot pie, you can give the classic a makeover by packing it full of green veggies and using low fat milk and chicken stock instead of cream.  Also, ditch the thick buttery pie crust and opt for thin sheets of crispy phyllo!

You will need the following...

-about 1lb boneless, skinless chicken breast, cut into 1/2 inch chunks
-salt and pepper
-1 tbsp olive oil
-2 leeks, bottom 4 inches only, washed well and chopped
-2 ribs celery, chopped
-2 medium potatoes, unpeeled and cut into 1/2 inch pieces
-2 cloves garlic, minced
-1 1/2 cups milk
-1/2 cup flour
-2 cups chicken stock
-2 cups frozen peas
-1 tbsp fresh thyme (or 1 tsp dried)
-3 sheets of frozen phyllo dough, thawed

First, preheat your oven to 350 degrees F.

Then, season the chicken with salt and pepper.  Heat 1 tsp oil in a non-stick skillet over medium heat.  Add the chicken and brown; transfer to a plate.

Heat 1 tsp more oil in the skillet.  Add the leeks and celery and cook until the vegetables begin to soften.  Add the potatoes, garlic, 3/4 tsp salt, and 1/4 tsp pepper and stir well to combine.

Add the milk.  Stir the flour into the broth until it is dissolved and add that mixture to the pan.  Cook, stirring, until the mixture comes to a boil.  Reduce the heat to medium low, cover, and simmer (stirring every so often) for about 10 minutes.  Stir in the chicken, peas, and thyme.

Now you're ready to put everything into the dishes to bake.  If you have little individual size baking dishes that's ideal, but if you don't this whole mixture should fit comfortably into a 9x13 baking dish.  You won't get that same "pot pie all to yourself" feeling, but it will be just as delicious.

Once you've spooned the mixture into the baking vessel of your choice it's time to cover it with the phyllo.  Cut the sheets to the correct size.  Place one sheet on top of the dish and brush with some olive oil; repeat with all the layers.  Tuck the edges into the rim of the dish, and sprinkle with some parmesan (if desired).  Bake for about 30 minutes...until the filling is bubbling.  Be careful when you take your first bite!

Perfect for when it's cold outside!

Sunday, 13 January 2013

Make your own take-out, part 1.

Ahh....pizza.  A staple of the student diet, this beautiful circle of food is just as good (if not better) for several days after it is first brought home.  Unfortunately, there are several drawbacks to take-out pizza. For starters it can be an expensive habit, and depending on where you order from the toppings are not always high quality.  It can also be hard on your waistline...and this is the biggest concern for those of us trying to avoid the dreaded "freshman" fifteen.

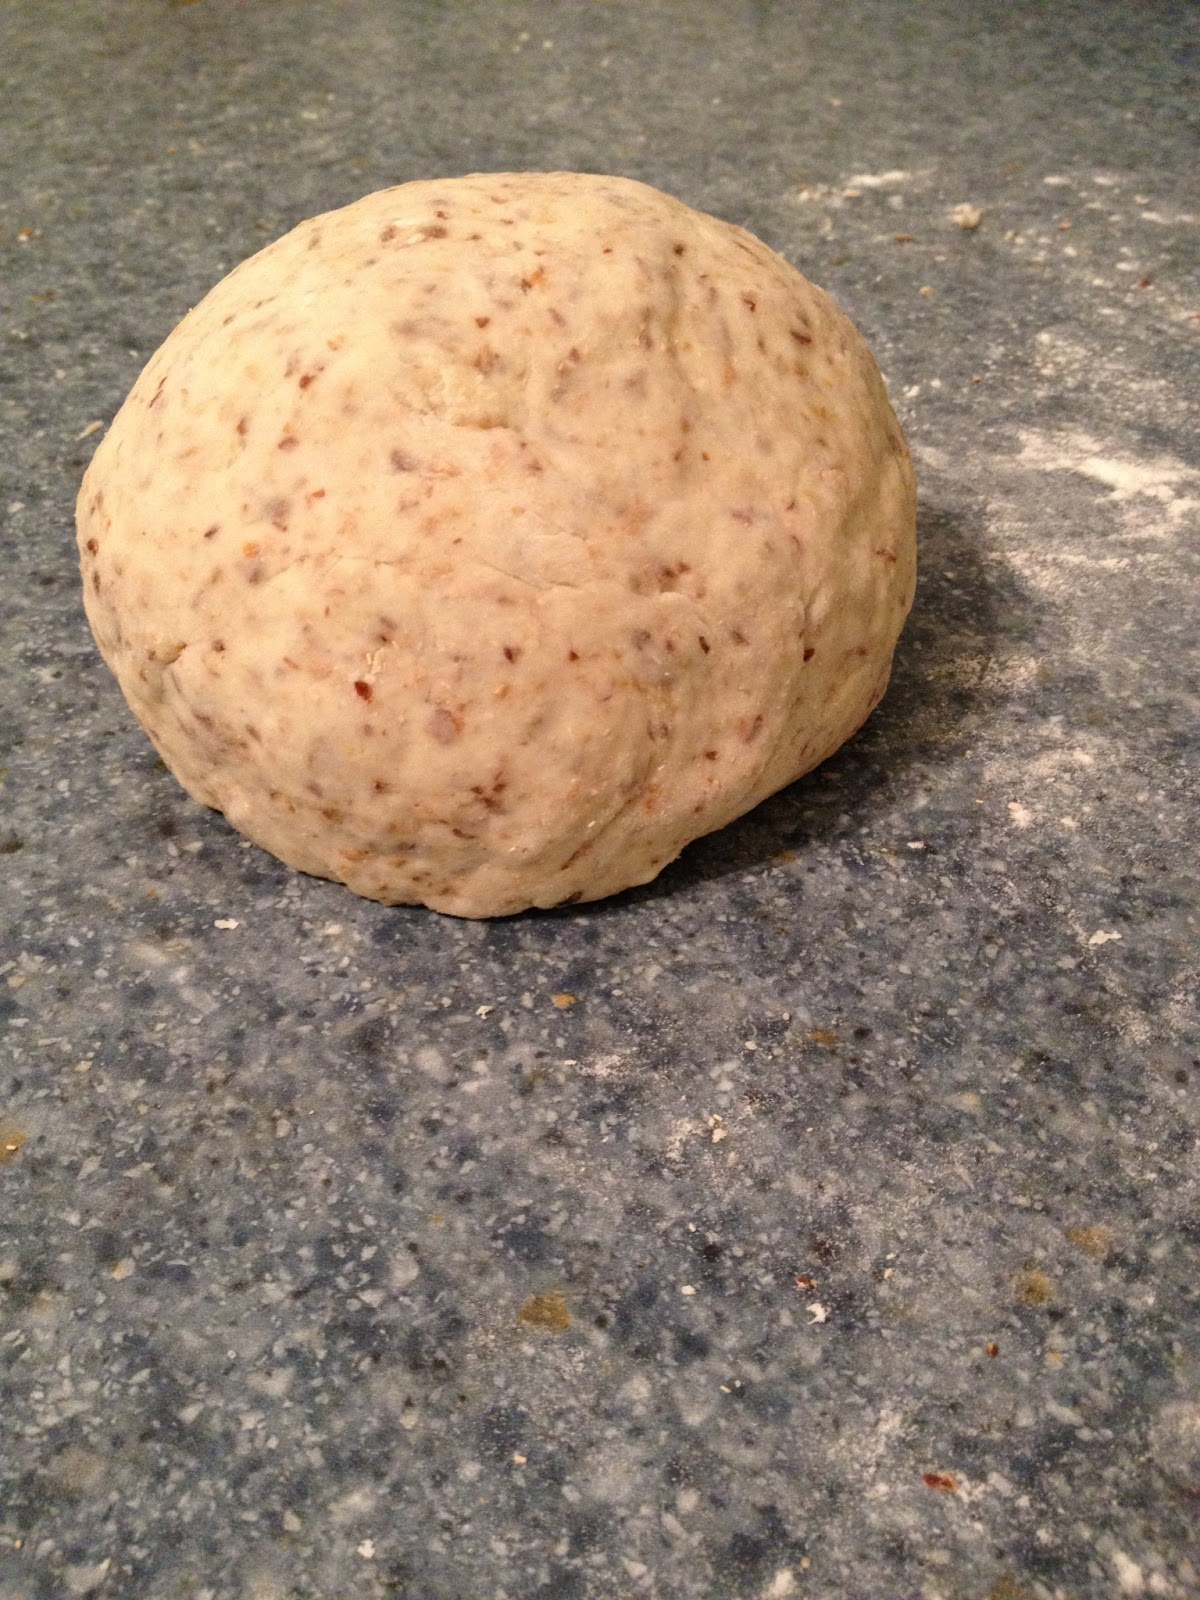
The good news is that pizza can be made by anyone, not just the professionals.  But it takes a couple of steps, and this can be intimidating for people who don't do much cooking.  In order to take some of the intimidation out of the process, I'm going to walk you through the steps with photos so that you can see what the dough should look like at each stage.

It also requires several different ingredients, which can look like a big investment for a single meal.  The thing you have to remember here is that most of the ingredients required are pantry basics.  One of the recipes for dough that I've included only requires flour, salt, yeast, and hot water...all ingredients that you might already have on hand, and all ingredients that (a) keep for a long time and (b) pop up in recipes over and over again.

The recipe that I personally use for pizza dough comes out of the Looney Spoons cookbook, and incorporates whole wheat flour and ground flax for a healthier crust.  Of course this is not for everyone so you'll find a basic recipe here as well...don't worry, the steps to making the dough are exactly the same in both cases.

Ingredients for whole wheat & flax dough          
-1 cup all-purpose flour
-1/2 cup whole wheat flour
-2 tbsp ground flax
-2 tsp quick rising yeast
-1/2 tsp salt 
-2/3 cup very warm water
-2 tsp olive oil
-2 tsp liquid honey

Ingredients for basic pizza dough
-2 cups all-purpose flour
-2 tsp quick rising yeast
-1 tsp salt
-3/4 cup very warm water
-2 tsp olive oil

Step 1: Combine your dry ingredients in a bowl, mix well.  If you're making the whole wheat and flax dough, also combine the water, olive oil, and honey in a separate measuring cup.  If you're making the basic recipe, do the same with the warm water and the olive oil.

Step 2: Pour water over dry ingredients and mix to form a ball.

Of course it won't be a "ball" so much as a "semi-solid collection of dough," but you get the idea.
Once the dough sticks (mostly) together, then it's time to move on.
Step 2.5: Turn dough out onto a lightly floured surface and knead for about 2 minutes.

It's hard to capture the exact moment you should stop kneading in a picture, but consider yourself done when the dough is smooth and elastic.  Add more flour as required to prevent the dough from sticking to the counter/your hands.
Step 3: Spray a medium sized bowl with cooking spray and place the dough inside.  Cover with plastic wrap and let rise in a warm place for about 20 minutes, until the dough has doubled in size.


After your dough has doubled in size, it's ready to go into the oven.  Turn it out onto a lightly floured surface and roll into whatever size and shape you need (the above recipes should comfortably fill a 12 inch round pizza pan).  Top as desired, and bake at 425 degrees F for about 15 minutes.

Stay tuned in the coming weeks for some of my favorite pizza toppings!!

Saturday, 5 January 2013

Resolving your weight away

One of the reasons I wanted to start this blog was to share stories about how I've lost (and kept off!) weight over the last year and a half.  And I did it not through crash dieting, but rather made a sustainable lifestyle change that involves delicious food :)

The number one New Years resolution made by women is to lose weight, which means that the January issues of women's magazines are always full of advice...some good, some bad, and some that just needs to be taken with a grain of salt.  My January 2013 issue of Cosmopolitan was no exception.  For their diet advice, they turned to Gary Taubes, who gave four pieces of advice.  Here's my take on his tips.....

Rule #1: Stop counting calories

If my experience has told me anything, it is that counting calories works.  However, this doesn't mean that a person should starve themselves between meals.  That is, in fact, the wrong thing to do.  Your body is a pretty smart thing, and if you're starving yourself in hopes of burning more calories than you consume in order to lose weight it's going to catch on fairly quickly.  When you do something like this your body goes into starvation mode, and stores as much extra energy as it can.

The key with calorie counting is eating smaller meals more often.  Breakfast, lunch, dinner...and healthy snacks in between.  This way your body is never starving, and it will burn the energy that you eat rather than saving it for later.

Rule #2: Start paying more attention to what you eat

This is a very good piece of advice, though Taubes comes at it from a "eat fewer carbs because those spike your insulin"place.  My take on this is: eat smart.  When it's snack time, go for an apple or a granola bar instead of a bag of chips.

I would also recommend that you start reading the labels on the snack foods you consume.  Specifically, look for where on the list of ingredients you find sugar...the closer it is to the beginning, the more sugar there is in the item.  This is especially relevant to "good" snacks like granola bars and yogurt...and it's a problem because it means snacks that are high in sugar do not keep you satisfied for long.

Rule #3: Don't stress about the fat you eat.

This is true...but don't go overboard either.  You need fat in your diet, but a little fat adds a lot of calories to a meal.  Popcorn, for example is an extremely healthy snack: 1 cup of air-popped popcorn has about 35 calories, and it counts as a whole grain snack.  But when you add butter the count goes up: there's about 100 calories in a single tablespoon of the stuff.  And the same goes for olive oil...it might be better for your heart than some of the other options out there, but you still want to use it in moderation.

Rule #4: Avoid carbs and sugar

This is probably my least favorite diet tip, mostly because I love bread and pasta.  So you heard it here first...you DO NOT need to give up carbs in order to lose weight.

The key is moderation, and making sure that whatever you're eating with your bread or pasta has enough protein to keep you satisfied.  Carbs are digested quite quickly, which means that it won't take you long to feel hungry again after you've eaten.  And, as was mentioned in rule #1, when your body finds itself starving it tends to hoard calories rather than burn them.  To prevent this from happening, make sure to eat something that is high in protein or fibre when you are eating carbs...these things take longer to digest and help you feel full longer, meaning that your body isn't going to think that you're trying to starve it into submission.

Sugar is the same...moderation.  You can't avoid it, especially since everything you eat is eventually broken down into this super basic energy source.  But you can make sure to consume it in moderation, and this is what I was hinting at in rule #2.  Read the labels, and buy things that have sugar as close to the bottom of the list of ingredients as you can.

Now that I'm done addressing Taubes' rules, I'm going to add one of my own....

Rule #5: Eat good food

There's this myth about dieting, and it's that diet food tastes like cardboard.  Not true.  There's also another myth, and it's that diet food requires all sorts of special ingredients and that it is hard to make.  Also not true.  Cooking for yourself is the easiest way to guarantee that you're eating something healthy, because you can control exactly what goes into your meal.  And when you're eating things that you love, dieting doesn't feel like work.

Which leads me to the shameless self-promotion...I created this blog to share what I've learned since my big change.  So keep tuning in...I've got some great posts lined up for 2013.  Among them, time saving shortcuts, recipe makeovers, and the occasional splurge.

Because what's the point of a diet if you can't cheat once in a while?

Sunday, 30 December 2012

Italian food, bachelor style

This holiday season I travelled to Japan to spend some time with my significant other.  It's always a challenge to cook while I'm there, for several reasons....

1) Foreign ingredients are hard to come by, and are expensive when you can find them.
2) My boyfriend has exactly two pots (one large, one small) and one frying pan.
3) No oven.

My boyfriend's kitchen...two burners, a microwave, and a broiler.
The third is probably my biggest challenge, since I love to bake and roast things.  But, as Barney Stinson would say, challenge accepted!!

Since we found ourselves in possession of some beautiful red wine, Italian seemed the way to go. But rather than go for the obvious pasta and sauce, we opted for chicken parmesan.  This is (mostly) a stovetop recipe, and only requires the chicken to be broiled for 2-3 minutes in order to toast the breadcrumbs and melt the cheese.

Required Ingredients
-boneless, skinless chicken breasts (1 per person)
-1/4 cup bread crumbs
-1/4 cup grated parmesan
-1/2 tsp dried basil (or 1.5 tsp fresh)
-salt and pepper
-olive oil
-tomato sauce (about 1/4 cup per chicken breast)
-grated mozzarella cheese (1/4 cup per chicken breast)

First, lightly toast the bread crumbs in a skillet.  Transfer to a bowl and let cool; then stir in parmesan cheese and basil.  Set aside.

Then, prepare the chicken.  Cover the breasts with plastic or wax paper, and pound until they are of even thickness.  Season with salt and pepper.  Heat oil in a skillet over medium heat, then add chicken and cook 3-4 minutes per side (until cooked through).

Once chicken is cooked, remove it from the skillet.  Top with tomato sauce and bread crumb mixture, then broil for 1 minute (until bread crumbs are toasted).  Sprinkle with mozzarella, then return to broiler until the cheese is golden and bubbling.

Then....enjoy!  Great with pasta, salad, garlic toast....or all of the above!!


Sunday, 23 December 2012

Making it work

My holiday dinners usually end with pie, but this year I decided to mix things up a bit.

My decision was, of course, influenced by the things I had around me.  I was at my parents, and I know that they don't have all of the same things that I might keep on hand for baking, and that their small town supermarket is not as well stocked as I would like.  So I looked at what they had and came up with a plan: caramel apple upside down cake.

Seriously.  Easiest dessert ever.

You will need:
-1/2 cup butter (or margarine)
-1 cup packed brown sugar
-1 tsp ground cinnamon
-3-4 medium apples, peeled and cut into 1/2 inch wedges
-1 box of cake mix (as well as the requisite egg and oil)

First, make the caramel by melting the butter in a saucepan.  Stir in the brown sugar and heat to boiling, then add the cinnamon (I also added one cup of crushed pecans for crunch).  Pour the caramel into a greased 9x13 pan (or two 9 inch round pans).  Arrange the apple slices over the brown sugar mixture.

Then, make the cake according to the package directions.  Pour over the apples, and bake until a toothpick inserted in the centre comes out clean (about 30 minutes in a 9x13 pan).  Cool in pan for 10 minutes, then flip onto a plate to serve.

Delicious with vanilla ice cream :)


Friday, 14 December 2012

Caroline & Julia

Whenever I'm having a down day, I like to go to Chapters and peruse the cookbook section of the store.  Don't judge me...it's where I find inspiration, and every so often I find a really good deal.  Like this one:


Since this is another kitchen bible, it was an offer too good to pass up.  The big question then became, with so many great recipes which would I make first?

I decided that since I had a holiday party to attend I would use Julia's knowledge to create a delicious appetizer and settled on Petits Choux au Fromage.  More colloquially...cheese puffs.

I chose to go with cheese because I wasn't quite ready to take on the task of making large dessert puffs (also, I had parmesan cheese in the fridge that needed to be used up before going on holiday)...but the basic process is still the same.  The batter is identical, with the exception of an extra teaspoon of sugar and a less salt in the case of dessert puffs.  According to Ms. Child, puffs are a wonderfully useful invention.  They can be either appetizer, entree, or dessert; and once you get the hang of the process you can have them in the oven within 30 minutes of starting to make the batter.

Also, who doesn't want to be known as "the person who brings cheese puffs to the party"?

After reading the recipe thoroughly (a very important step whenever you're trying something for the first time) I was ready to go.  Here's what you'll need to do to make your own:

Step 0: Preheat your oven to 425 F.

Step 1: Combine 1 cup water, 6 Tbsp butter (3/4 stick), 1 Tsp salt, 1/8 Tsp pepper, and a pinch of nutmeg in a medium sized pot.  Slowly bring to a boil, and boil until the butter is melted.

Step 2: Remove from heat and pour in 3/4 cup flour.  Beat vigorously to blend thoroughly.  Then beat over moderately high heat for 1-2 minutes until the mixture forms a mass and begins to film the bottom of the pan.

Step 3: Remove from heat and make a well in the center of the paste.  Break 1 egg into the centre of the well and beat into the paste until it has absorbed.  Do the same with 3 more eggs (4 eggs total); adding one at a time.  After all the eggs are added, beat a moment more to be sure it is well blended.

Step 4: Add 1 cup grated cheese (I used parmesan).

Step 5: Either squeeze (using a pastry bag) or spoon batter onto a greased cookie sheet.  Mounds should be about 1 inch in diameter.

Step 6: Bake in the upper and lower thirds of the oven for 20 minutes (until they are golden brown and are firm and crusty to the touch).

Step 7: Remove from oven and pierce the side of each puff with a sharp knife.  Set the puffs back in the turned off oven and leave the door ajar for 10 minutes.

Final step....enjoy!

I hope these are a hit at my party......

Thursday, 6 December 2012

A 15 Minute Meal

...that I bet you've never thought of.

When you want food fast it's easy to turn to takeout, but this is not your only option.  There are plenty of delicious meals out there that take very little time to cook.

The secret: frozen shrimp.

A staple in my freezer.
These sweet frozen morsels can be thawed in less than 5 minutes, and fully cooked in under 10.  Tonight, I used them to make Roasted Shrimp and Broccoli.

I've made this recipe several times, and have thus taken the time to improve upon the original online offering.  The quantities I give here make one plate for one person...be sure to adjust accordingly if you're cooking for more.

1) Preheat the oven to 425 degrees F.

2) Put the frozen shrimp in a colander under cold running water so that they can thaw.

3) While the shrimp thaw, pre-cook the broccoli.  Put the broccoli in a microwave safe container, and add enough water to cover.  Microwave on high for 3-4 minutes (until broccoli is slightly tender), then drain and spread on a cookie sheet.

Tip: buy pre-cut broccoli florets to save on prep time.

4) By now your shrimp should be thawed.  Toss in 1/2 tbsp olive oil, 1/2 tbsp lemon juice, 1/8 tsp salt, 1/8 tsp pepper, and whatever other herbs/spices tickle your fancy (I usually add some Italian seasoning and red pepper flakes).  Add shrimp to cookie sheet.  Drizzle the rest of the oil/spice mixture over the broccoli.

5) Bake for 8 minutes, then enjoy!  I like to enjoy my shrimp with garlic bread and white wine........ 

Seriously delicious, and seriously little work.